Table of contents
Quality control: checking the quality of audio and video files
Last updated: 05 March 2024
MediaArea tools for QC (quality checking/quality control)
Open source tools available from MediaArea
MediaInfo
MediaInfo is one of MediaArea’s free tools, which allows you to look at a report of the structural metadata of media files. To see a list of all metadata fields and their descriptions, click here. Below is a comparison of how MediaInfo presents the metadata information on a PC and on a Mac, both using Tree view.
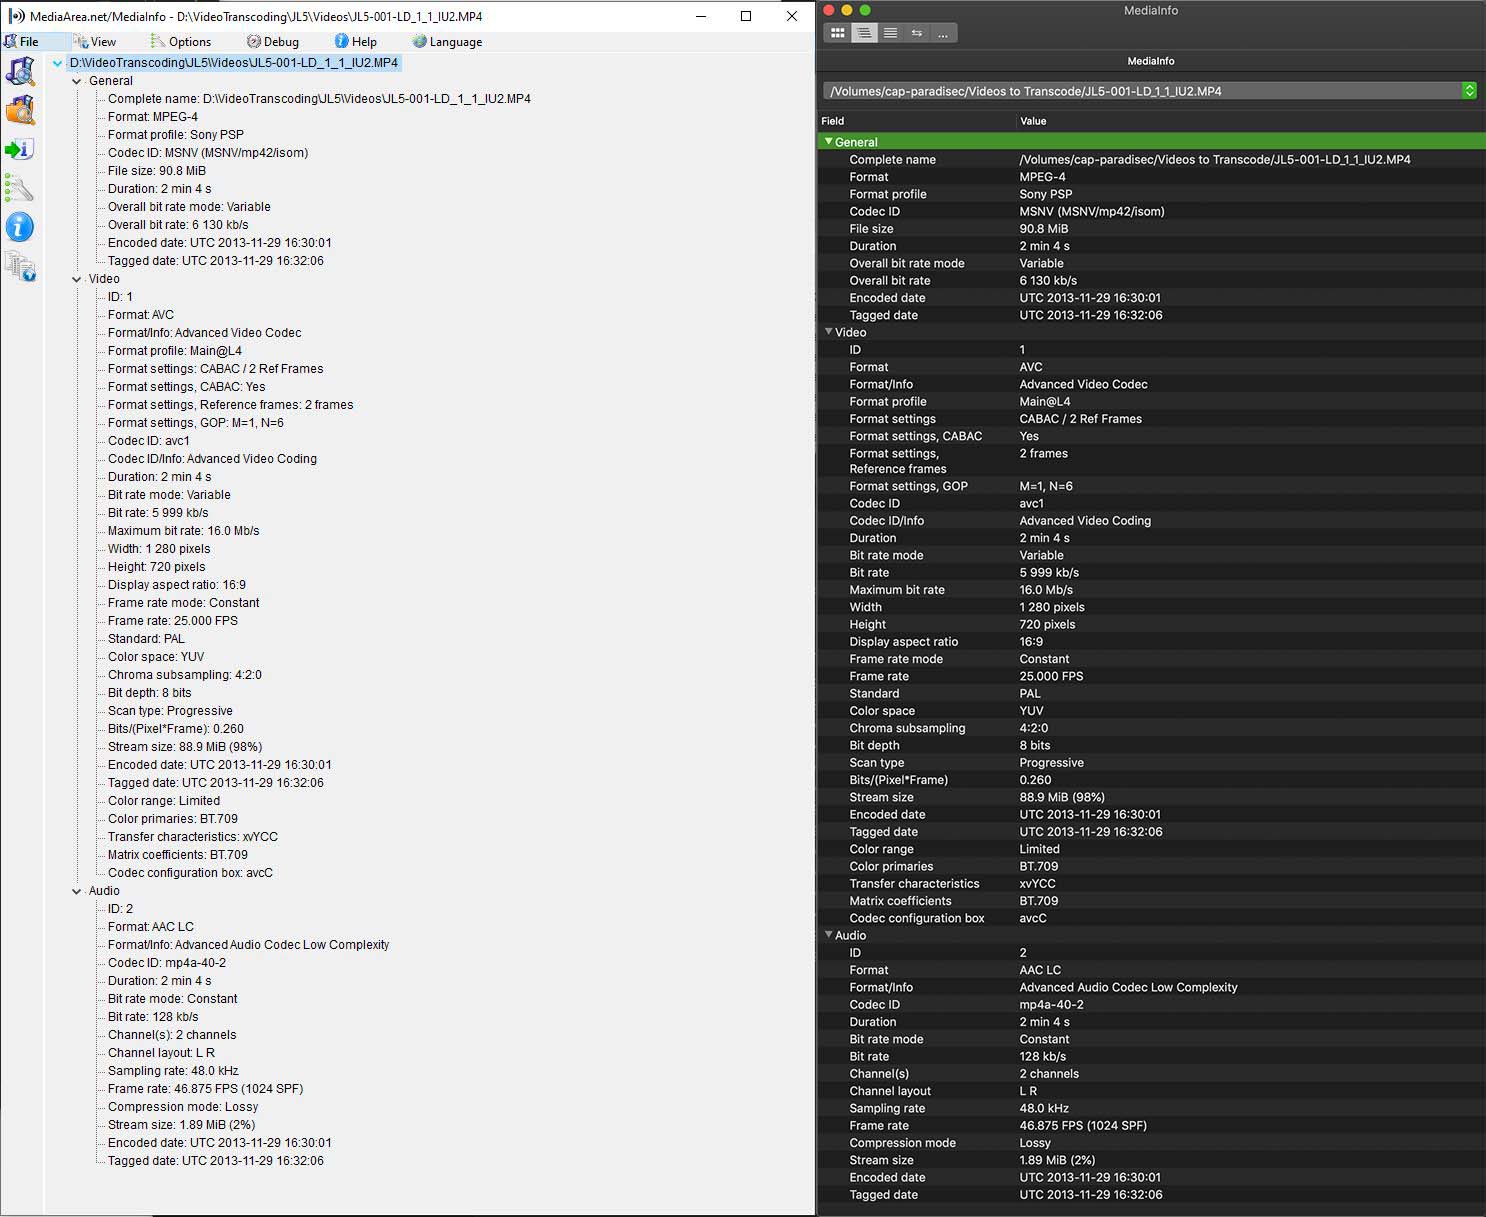
You can open multiple files at one time using the app, but be warned- if you are using MediaInfo on a PC, each metadata report will open in a separate window unless you first open the app, and use the import folder option, or simply drag a selection of files the app after you have switched to Sheet view (see next).
On a Mac, only one window opens, but you can select which file to view from a dropdown menu in the file address bar at the top. The next section explains another option to view multiple file reports without having to look at one report at a time.
Bulk output MediaInfo reoprts: Windows
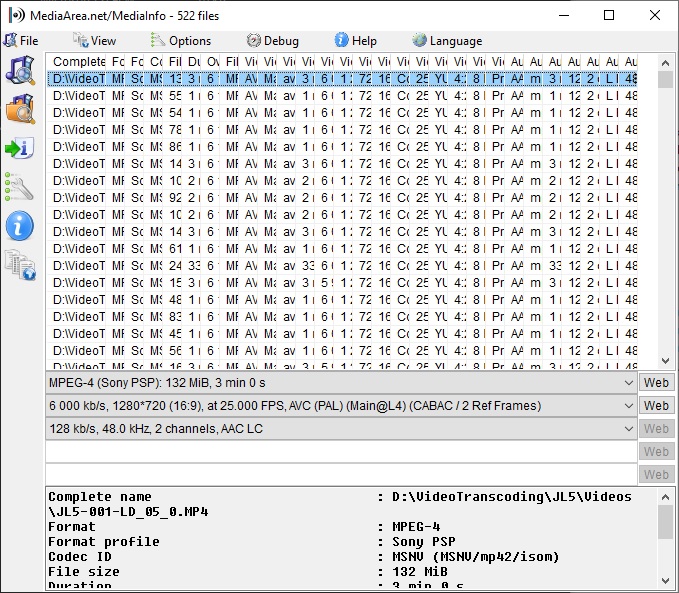
Using the MediaInfo GUI (examples are from v21.09), open the program, then add media to explore. To do this press icon Select a folder to examine, located on left pannel of window, or go to the MediaInfo menu and select File>Open>Folder…. It is best if you have only the media you want to examine in that folder and avoid adding nested folders. The image below shows all selected media files. To get this view, go to the menu and select View, then select Sheet.
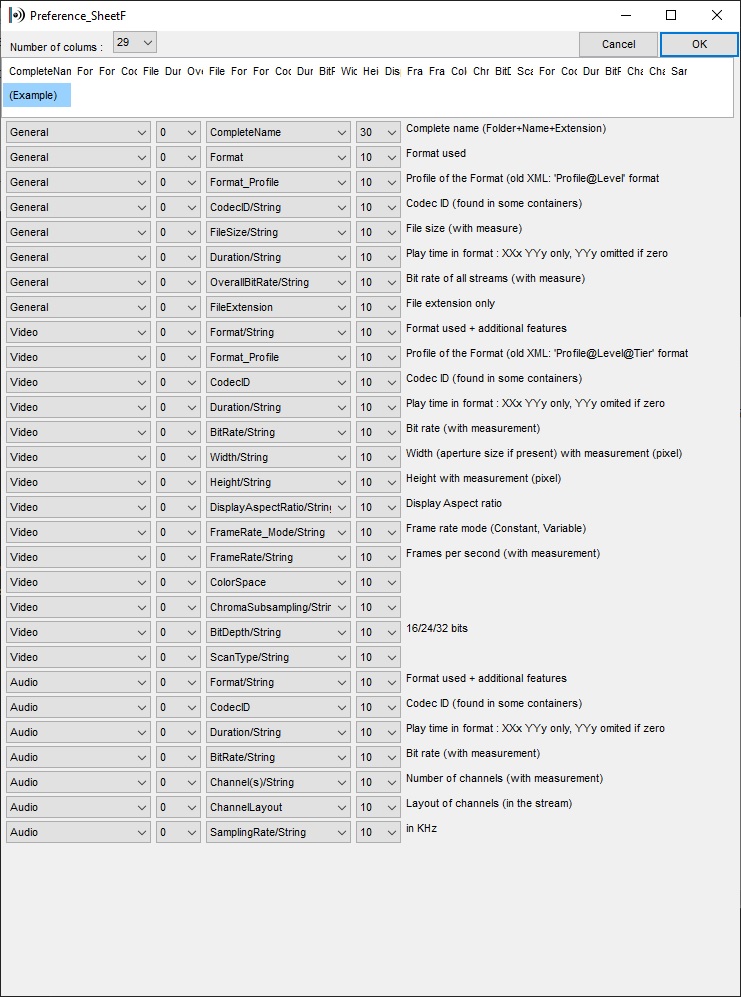
To select what metadata fields you want to export to a csv, go to Options>Preferences, or just click on the wrench icon to the left. The preference window will open. Under Customize select Sheet and then New….
Make your choices for the attributes you wish to export. You may need to experiment with this. I have selected the following 29 attributes to include in my export. You’ll notice the three categories of metadata: General, Video, Audio. These correlate to the sections of metadata found in the MediaInfo reports (see comparison image above).
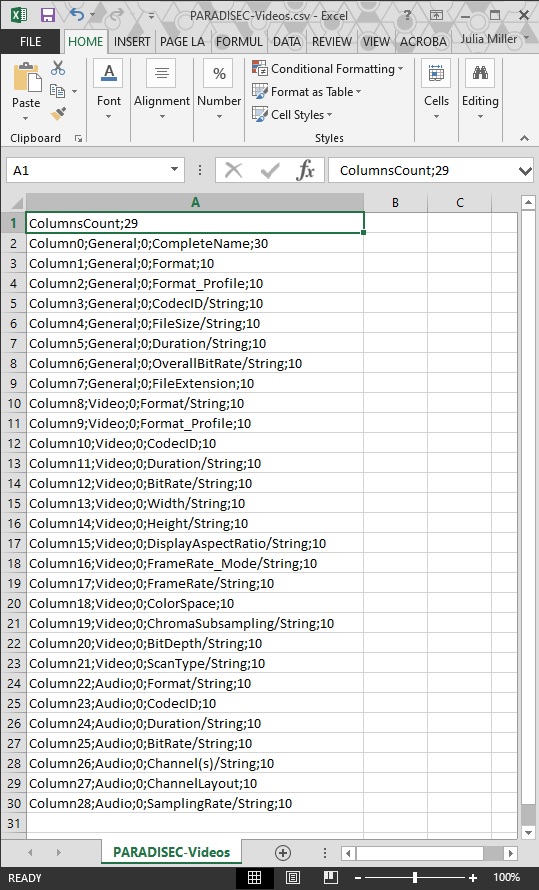
Your selections are saved as a .csv here: C:\Users\“YourUserName”\AppData\Roaming\MediaInfo\Plugin\Sheet. If you want to share this customisation with someone, or use it on a different PC, just copy the .csv and place it in the correct directory on the other computer, thus avoiding having to repeat the process. Below is a snapshot of the .csv content:
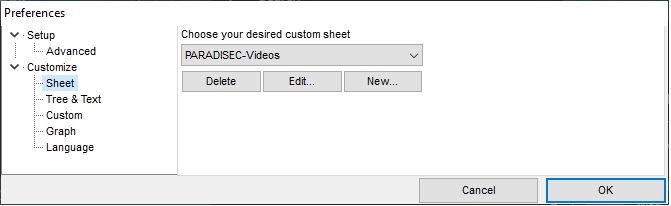
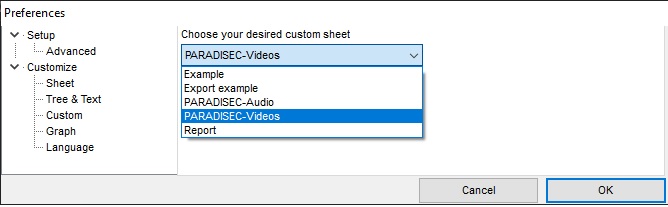
When you are ready to export your batched metadata reports, go to Preferences to select your custom sheet from the dropdown menu:
Then press the icon on the left with the arrow and the “i”. This is the export function. Alternatively, you can go to File>Export in the menu. This window will open, directing you to choose your export format.
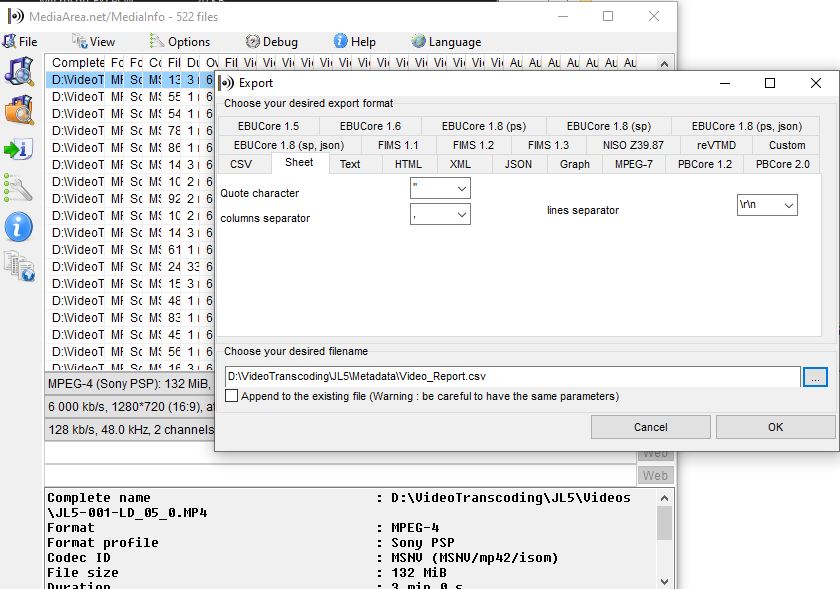
Click on the Sheet tab, select the comma from the dropdown menu for the columns separator, then name your output file and select the location where you want to save it.
Bulk output MediaInfo reports: Mac
You can dowload the MediaInfo app from the Mac App Store, or from the MediaArea website https://mediaarea.net/en/MediaInfo/Download/Mac_OS. The Mac MediaInfo app differs from the Windows version in that you cannot view sheets, or export bulk reports using the GUI.
In order to do a bulk export you need to do the following:
- Create a .txt file that lists the specifications you want to export, and name this file “Options.txt”. Again, as with the Windows specifications, you will need to experiment with how they are named. Here is some suggested content for Options.txt for video reporting:
  General;%FileName%,%Format%,%Format_Profile%,%CodecID%,%FileSize%,%Duration%,%OverallBitRate%,%FileExtension%,
  Video;%Format%,%CodecID%,%Width%,%Height%,%DisplayAspectRatio%,%FrameRate%,%ColorSpace%,%ChromaSubsampling%,%BitDepth%,%ScanType%,%Compression_Mode%,
  Audio;%Channel(s)%,%ChannelLayout%,%SamplingRate%,
  File_End;\r\n
-
Place the file Options.txt in the same folder as the files you wish to examine.
-
Open Terminal and navigate to the directory where your videos and the Options.txt is located.
-
Then type the following into the terminal:
MediaInfo --Output=file://options.txt /Volumes/"YourDirectory" \*.\* > output.csv
Unfortunately, this will output a .csv without headers for the columns. You can keep a separate .csv saved with just the headers to paste in each newly exported report.
If you are not able to install MediaInfo onto your computer, there is a web version of MediaInfo where you can create and download reports of your video files via the web browser. Your media stays safe, as nothing is actually uploaded to their servers. MediaInfoOnline
Media Conch
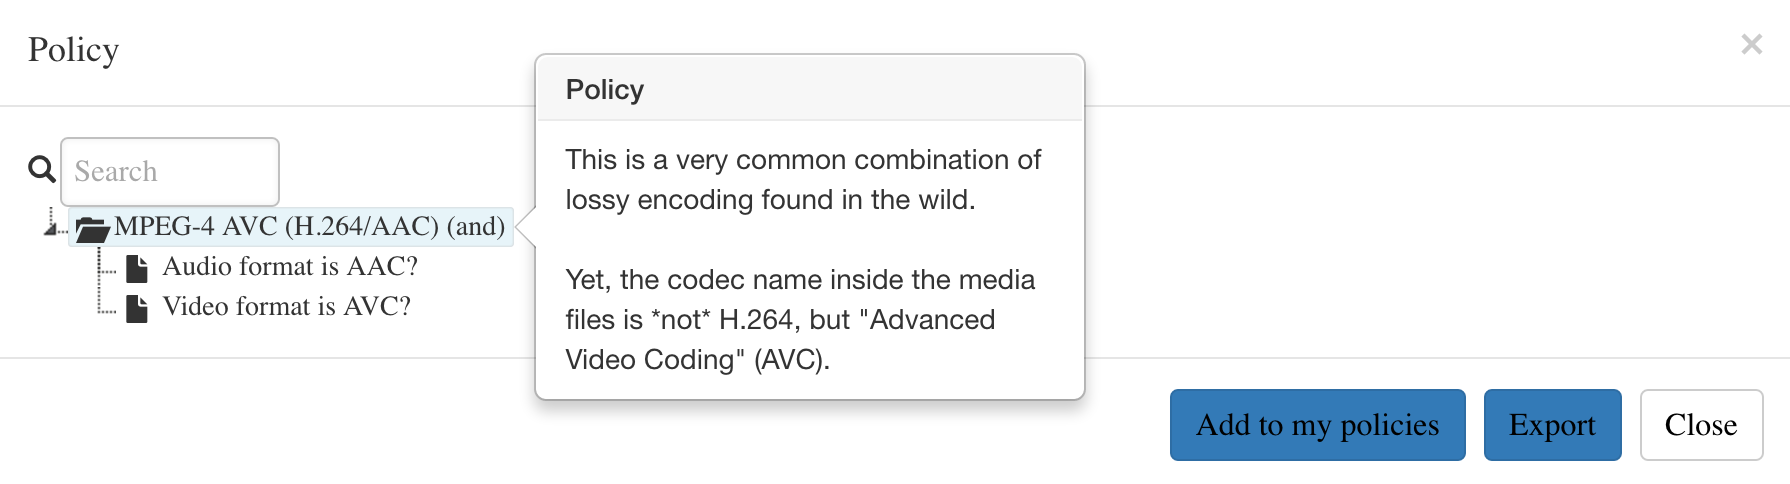
Media Conch is a tool which enables you to view batch MediaInfo reports. You can create policies that checks your media against certain parameters, determining if the metadata fits your specific needs. Below public policy that checks if an .mp4 video has H.264 encoding or not. You can find this public policy on the Public Policy tab within the app.
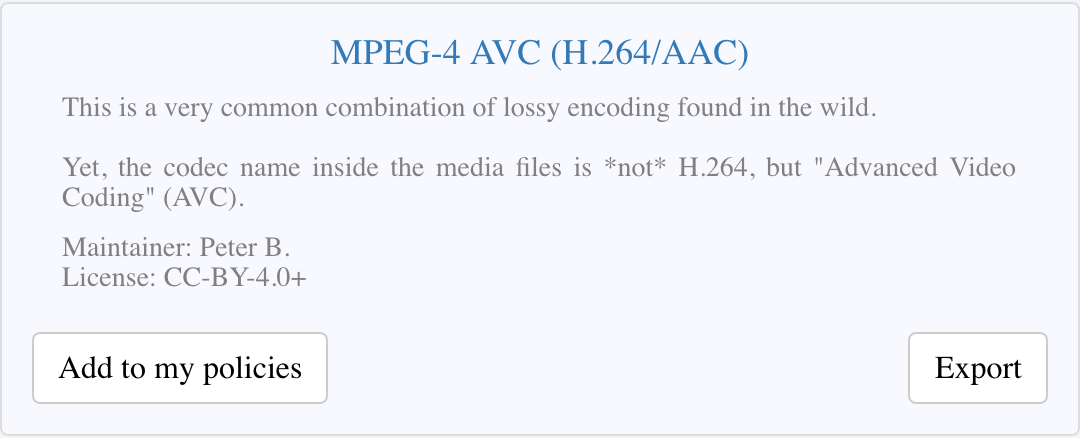
This is the description of the checks this policy is performing:
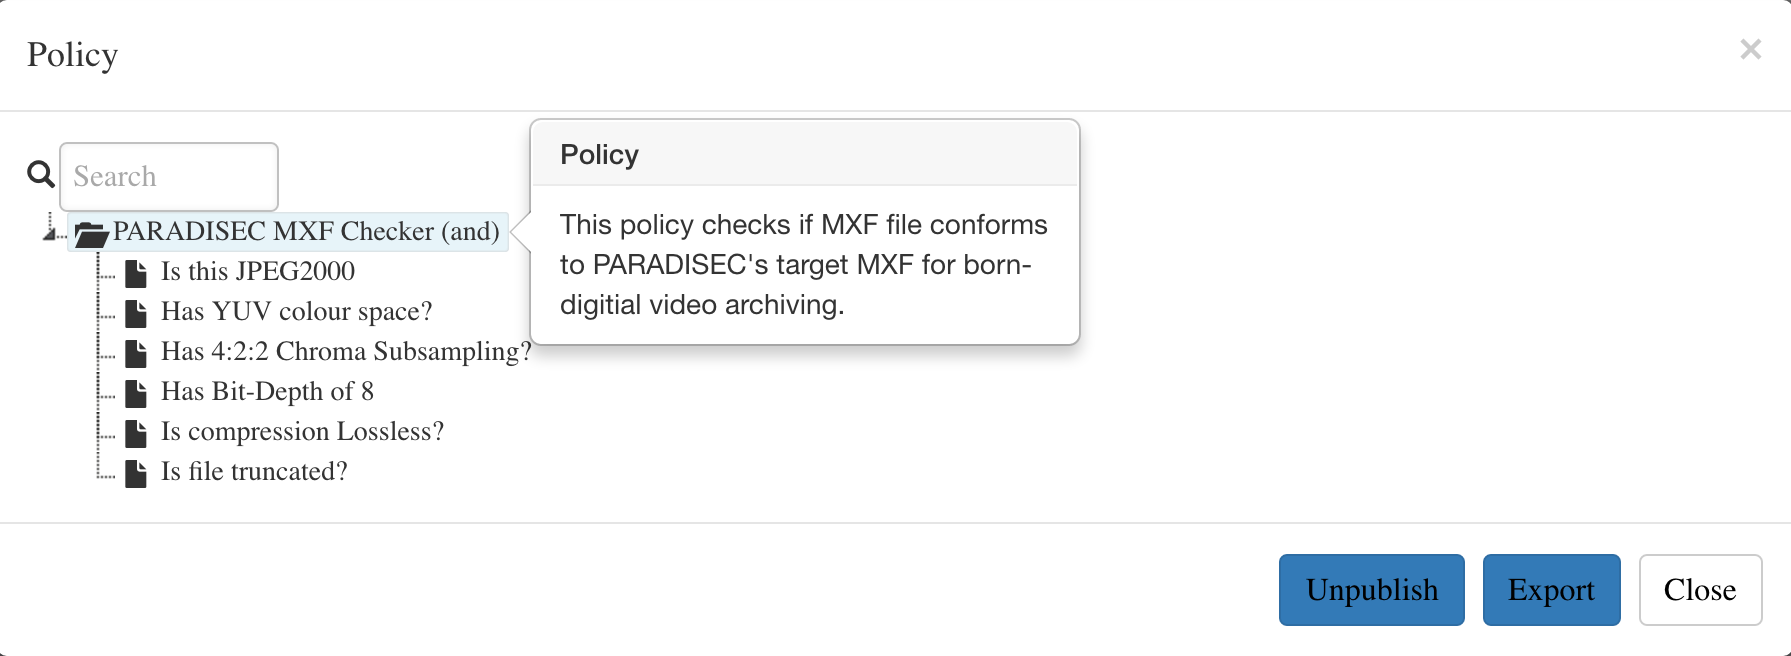
Here is a policy I created for PARADISEC, to determine if the MXF has conformed to all of our target parameters. This checks if the MXF is lossless and has the expected colour space and chroma subsampling of YUV 4:2:2, and has a bit depth of 8, etc. Policy checking can be done across multiple files at once.
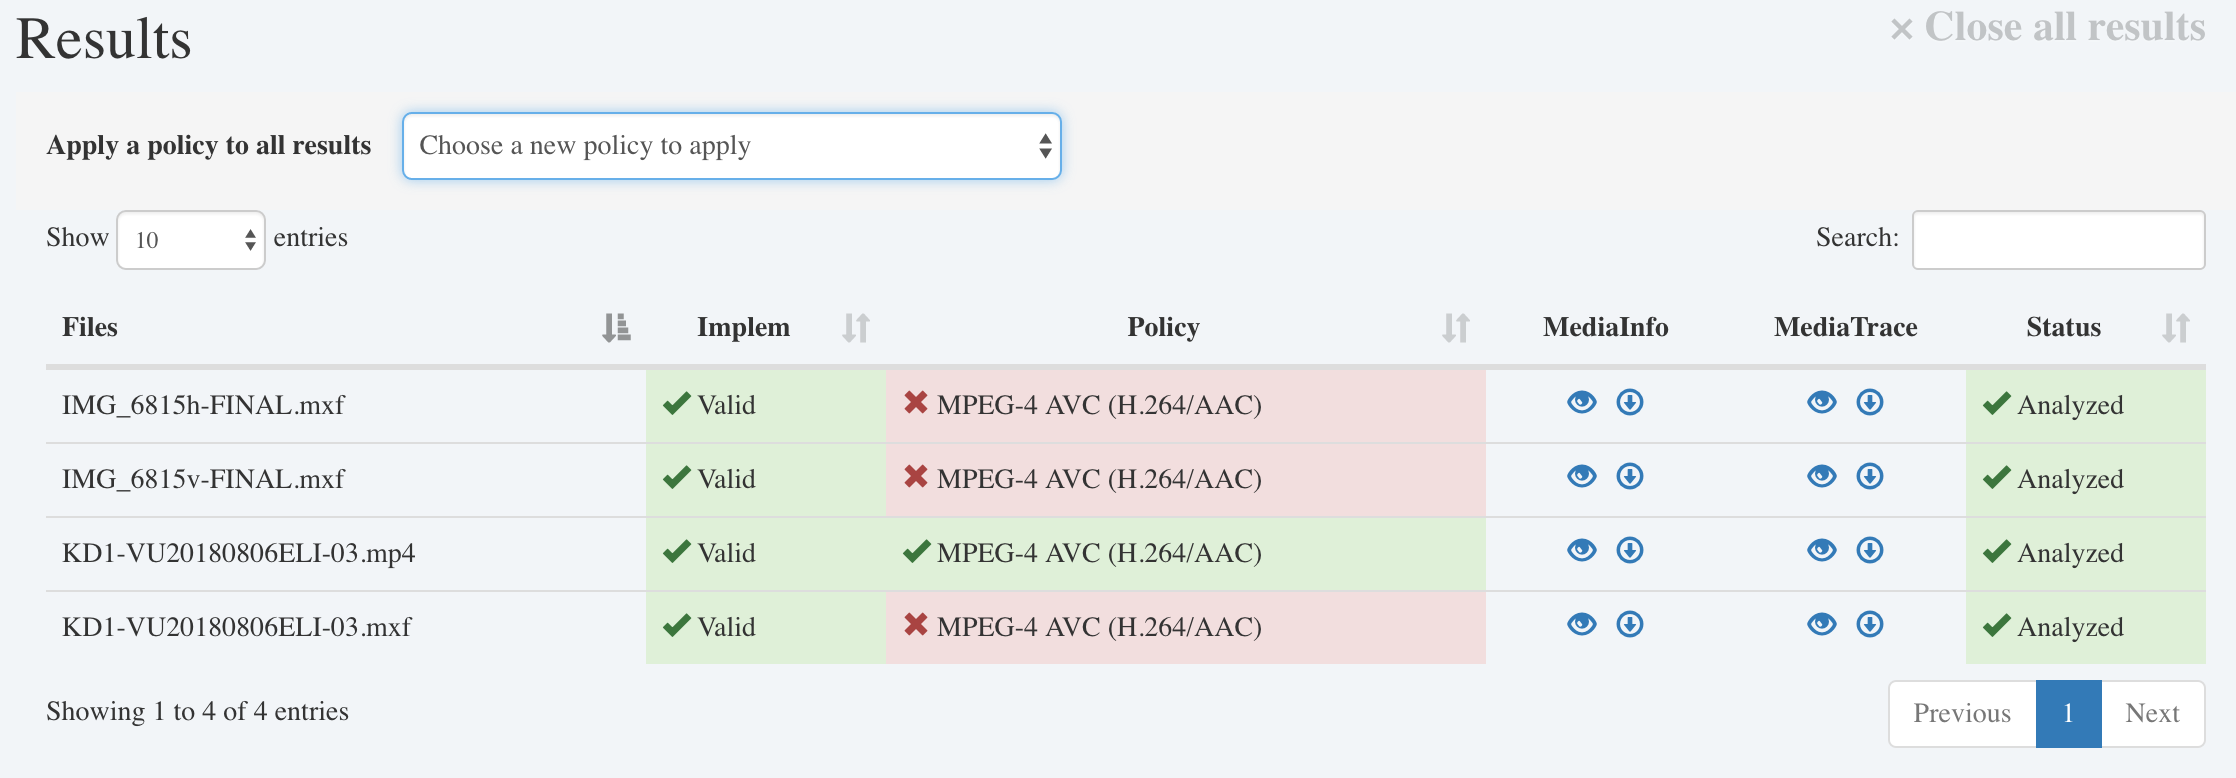
Here are the results from the MXF policy check.

Media Conch also allows you to view MediaInfo reports within the program as well as the more technical Media Trace reports, which present the binary architecture of the files as defined by MediaInfo.
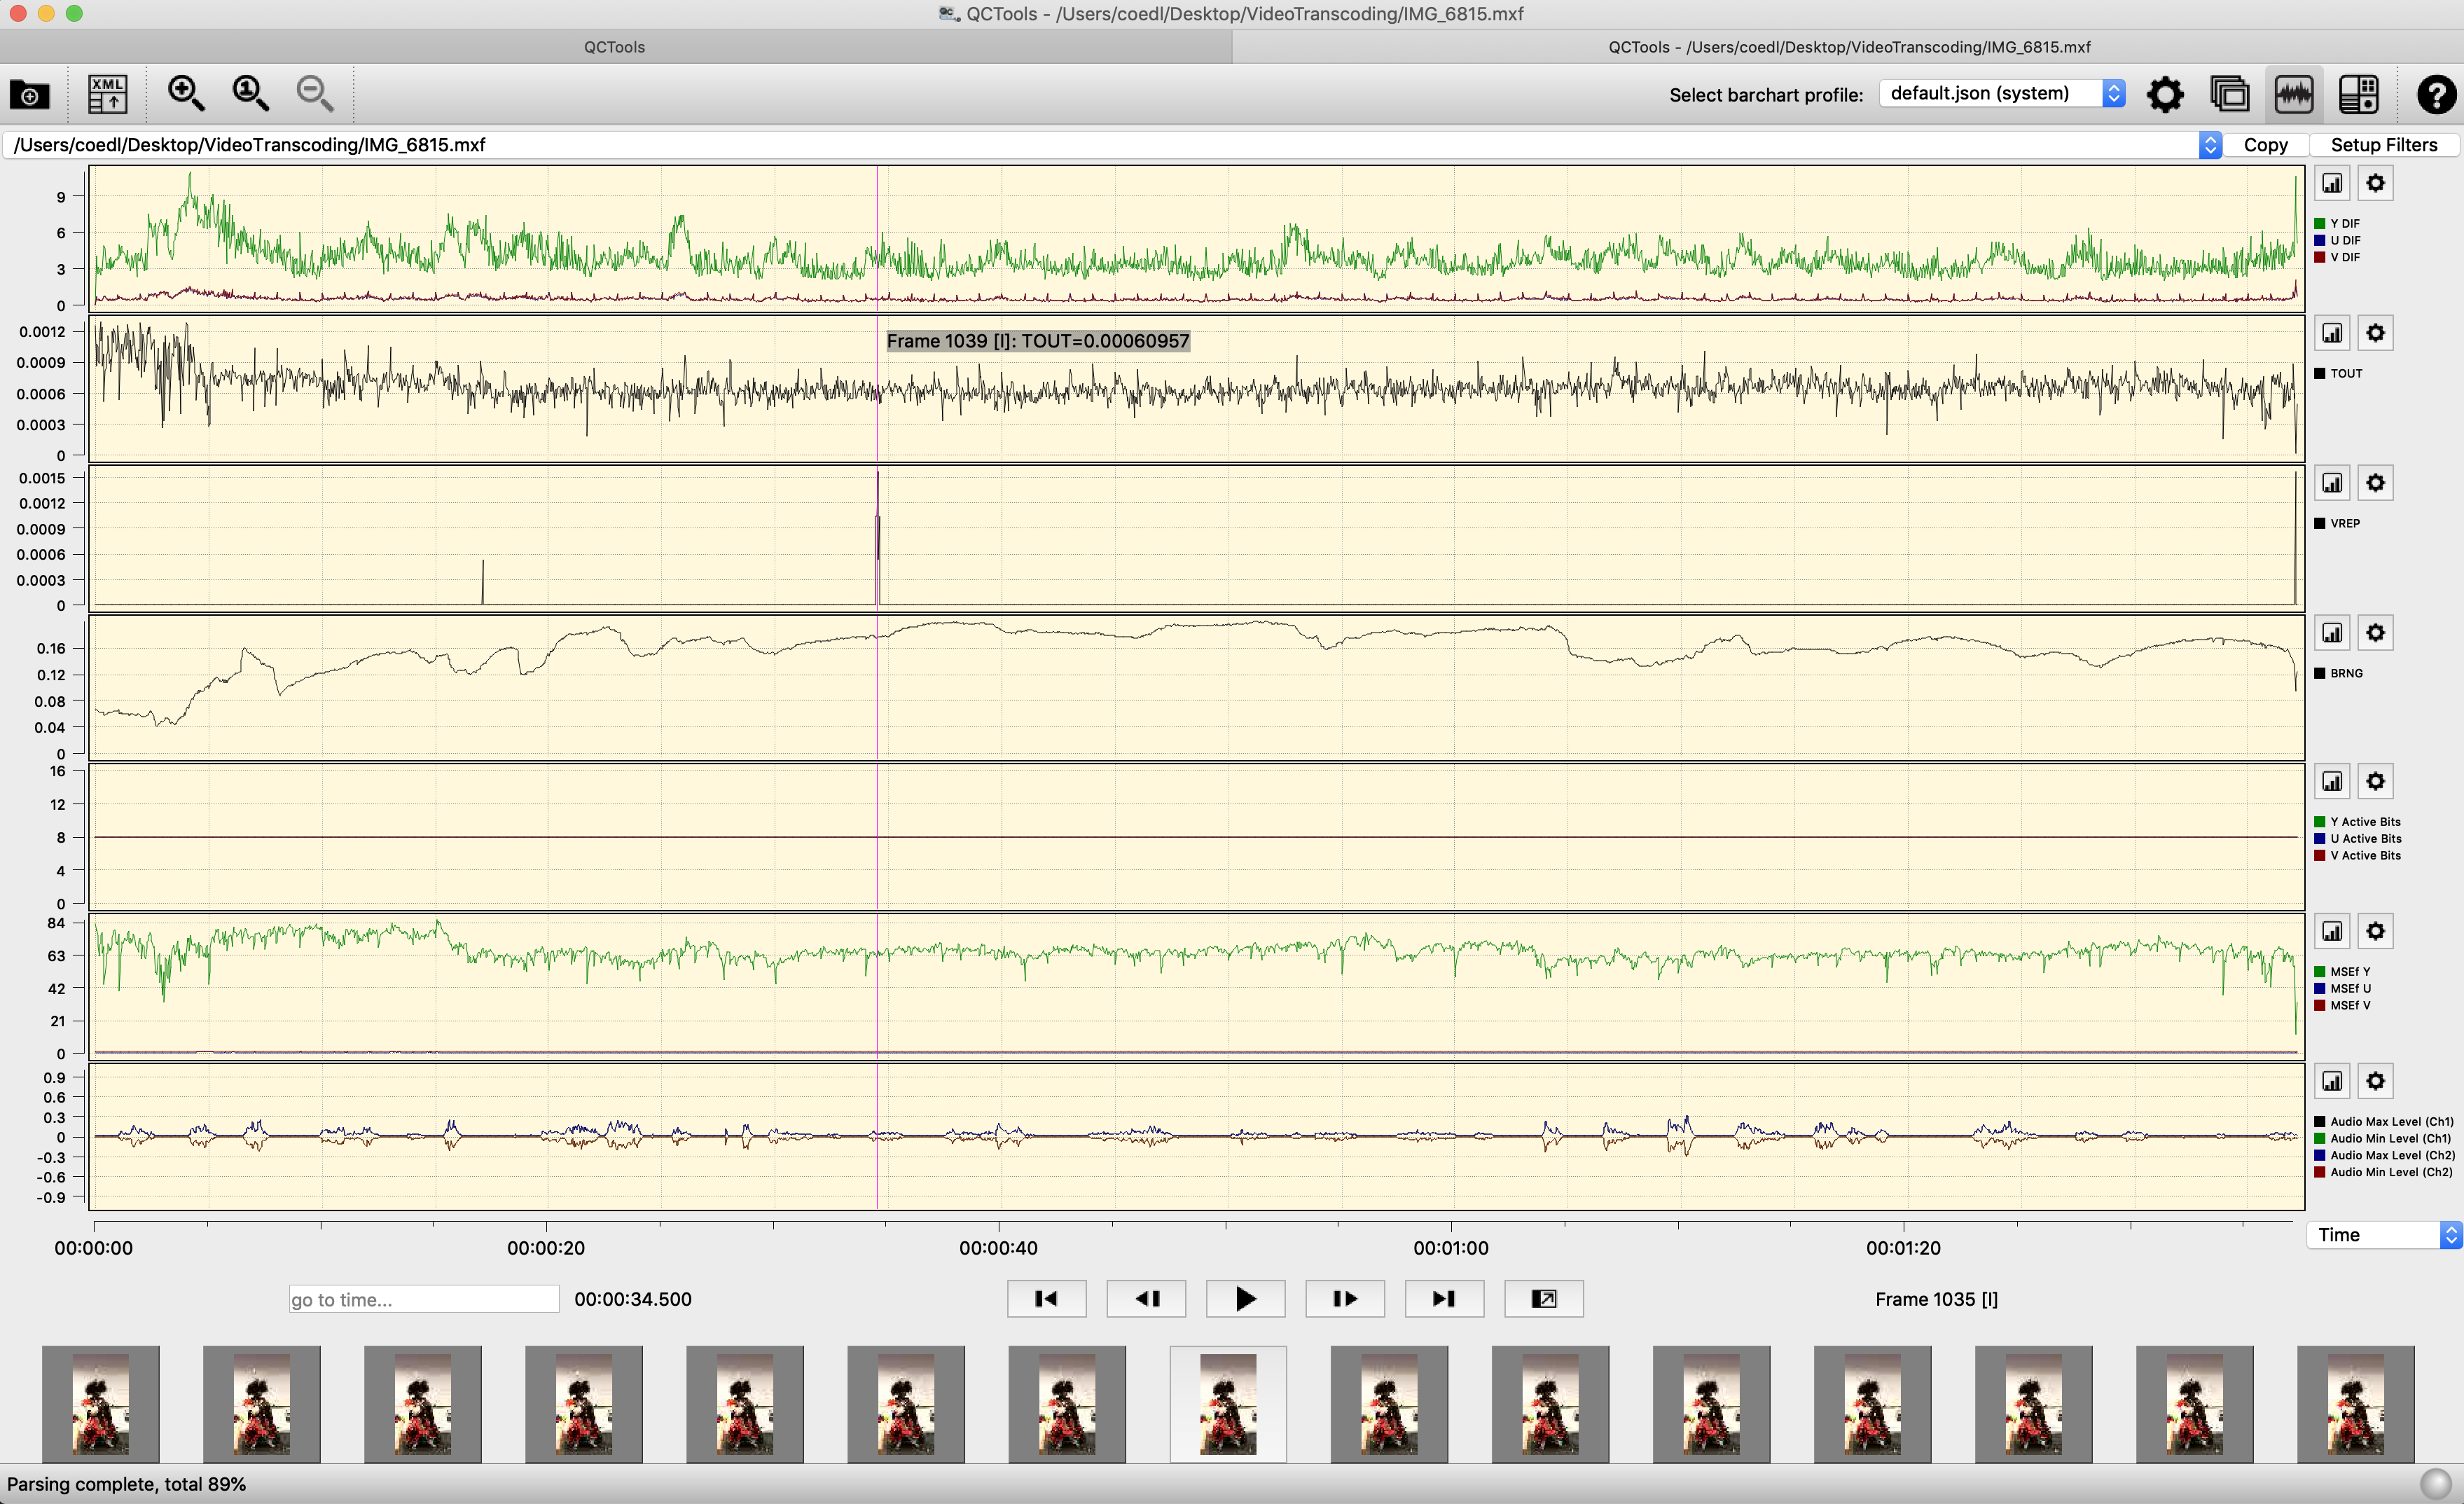
QC Tools
QC Tools offers tools that allow users to investigate the quality of digitised videos using filters and analytical tools. You can select various filters in the graph mode as seen in the image below.
as well as in the player mode
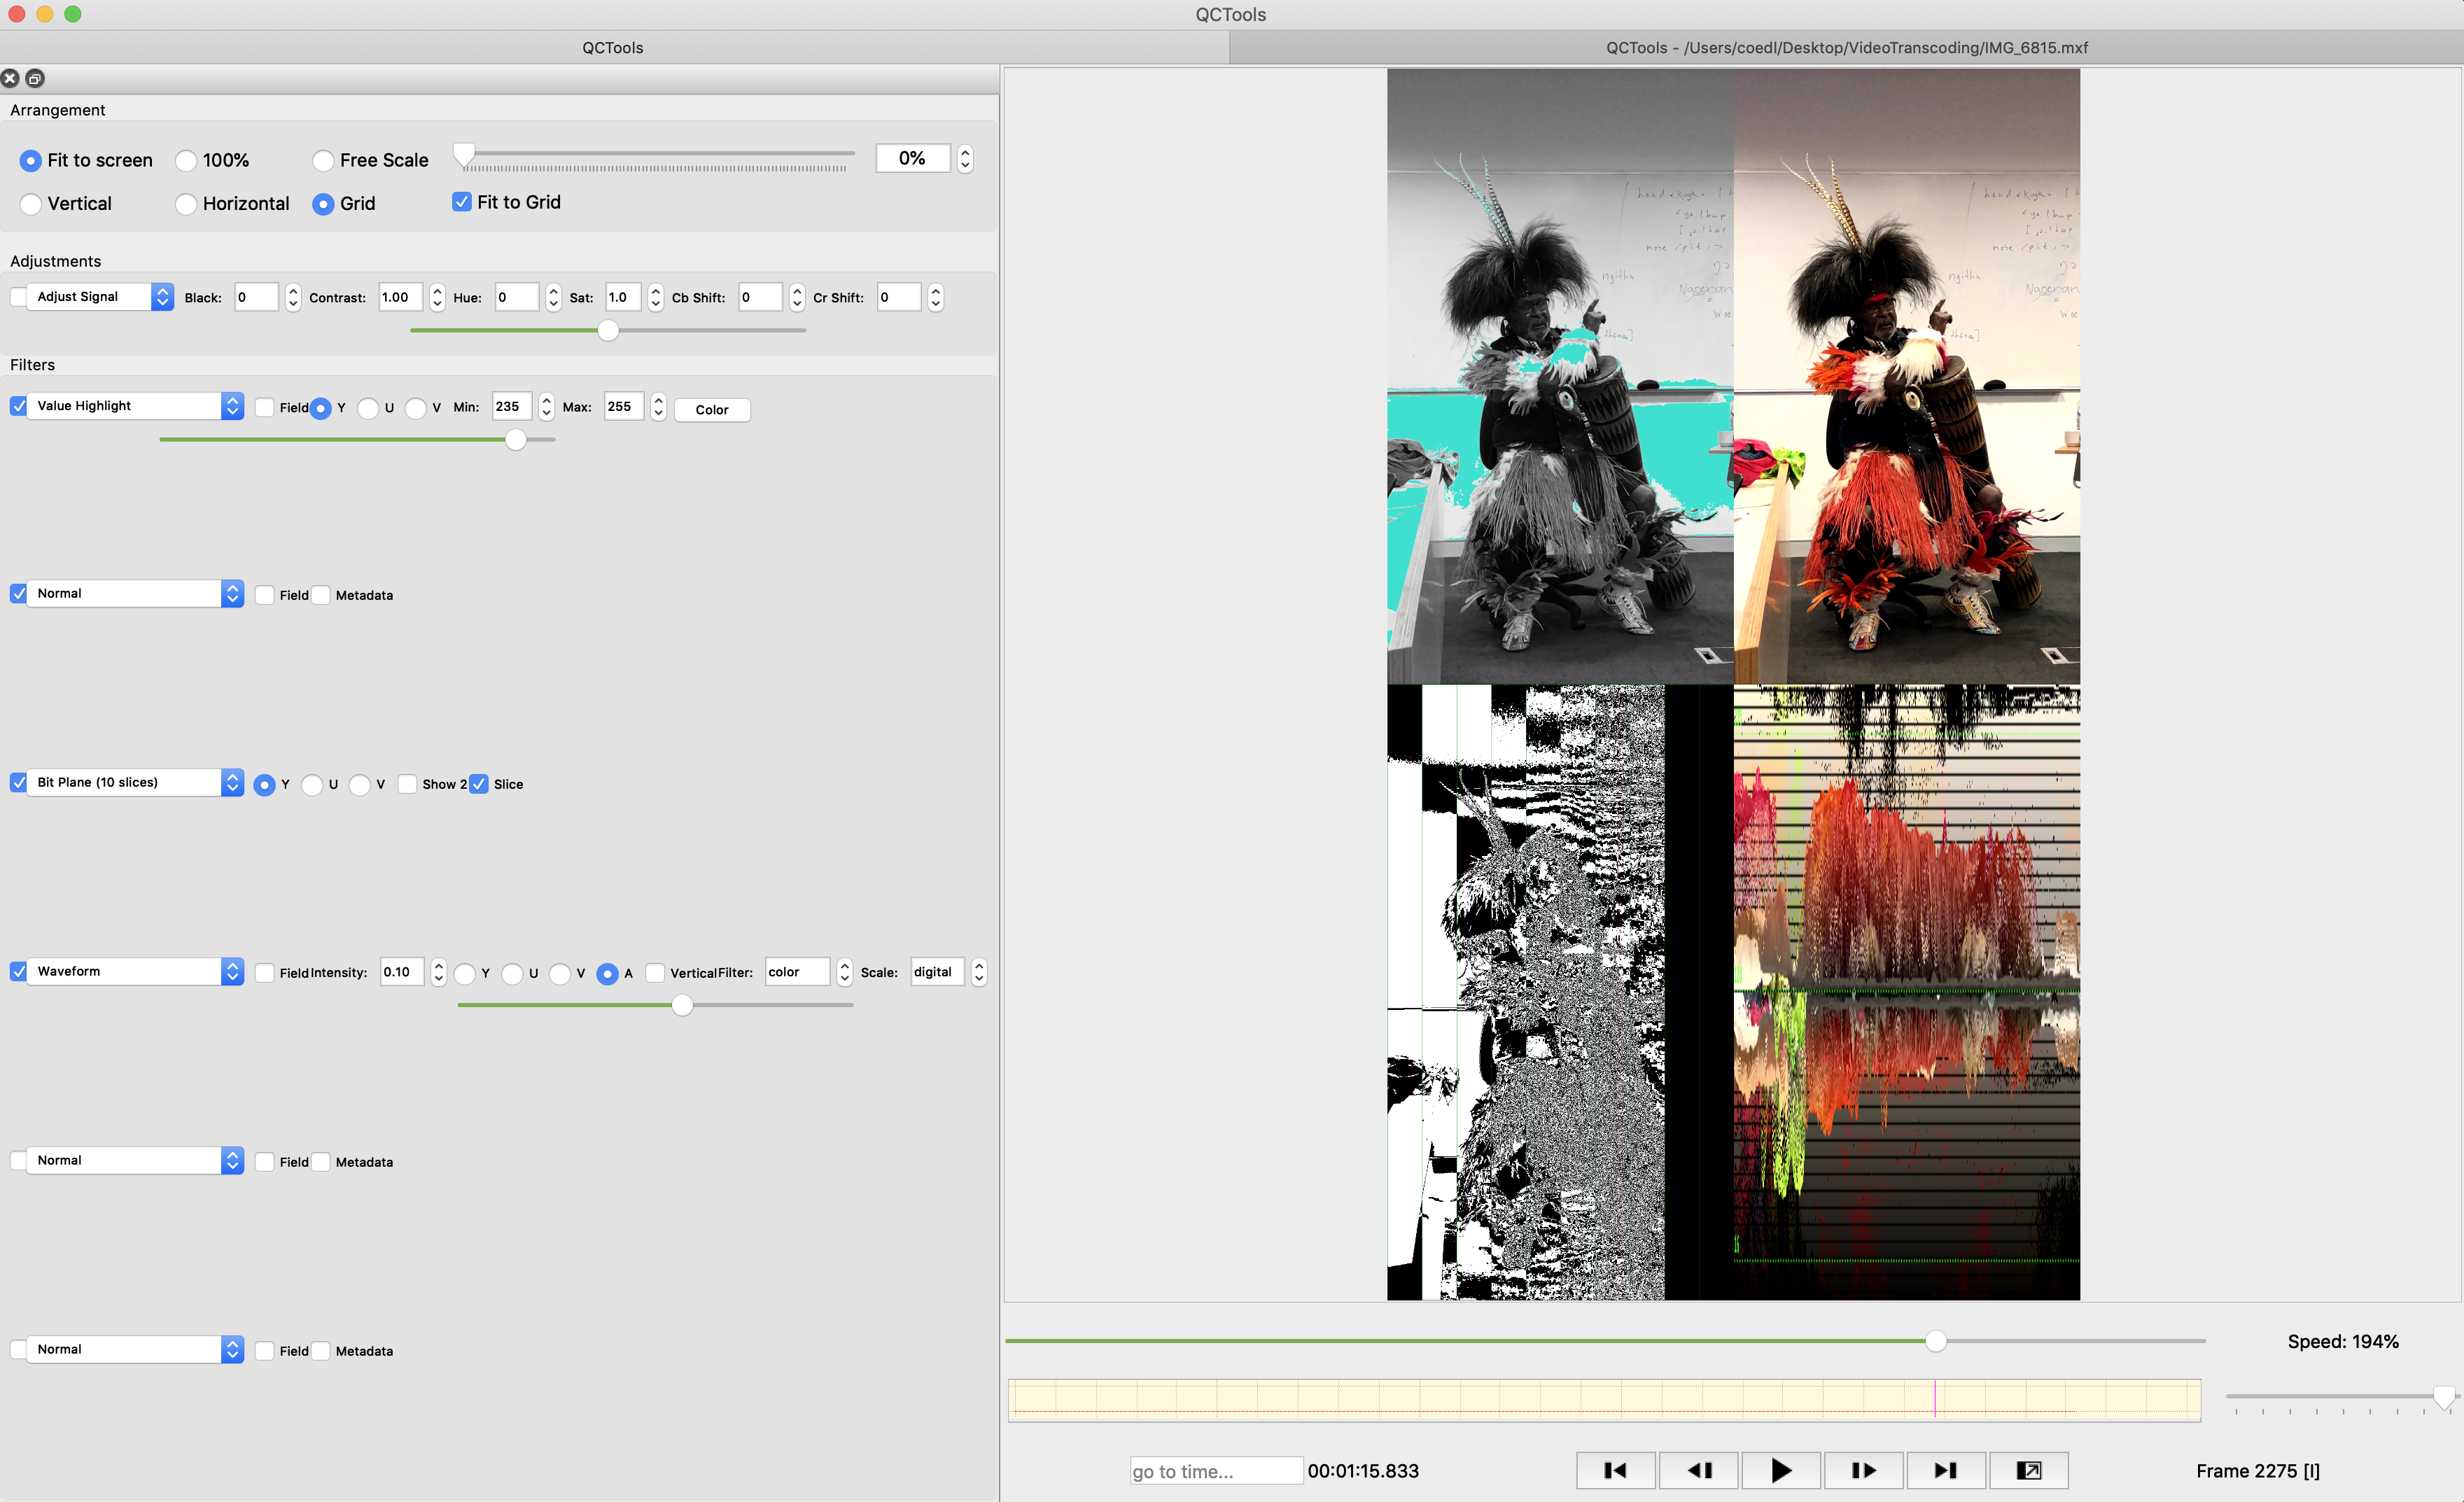
Visit this QCTools page for descriptions of their playback filters.
Additional resources
⬆️ Back to top

This work was created by Julia Colleen Miller and is licensed under a Creative Commons Attribution-NonCommercial-ShareAlike 4.0 International License.